
Nameplate
(Sculpey LivingDoll)
 |
|
|
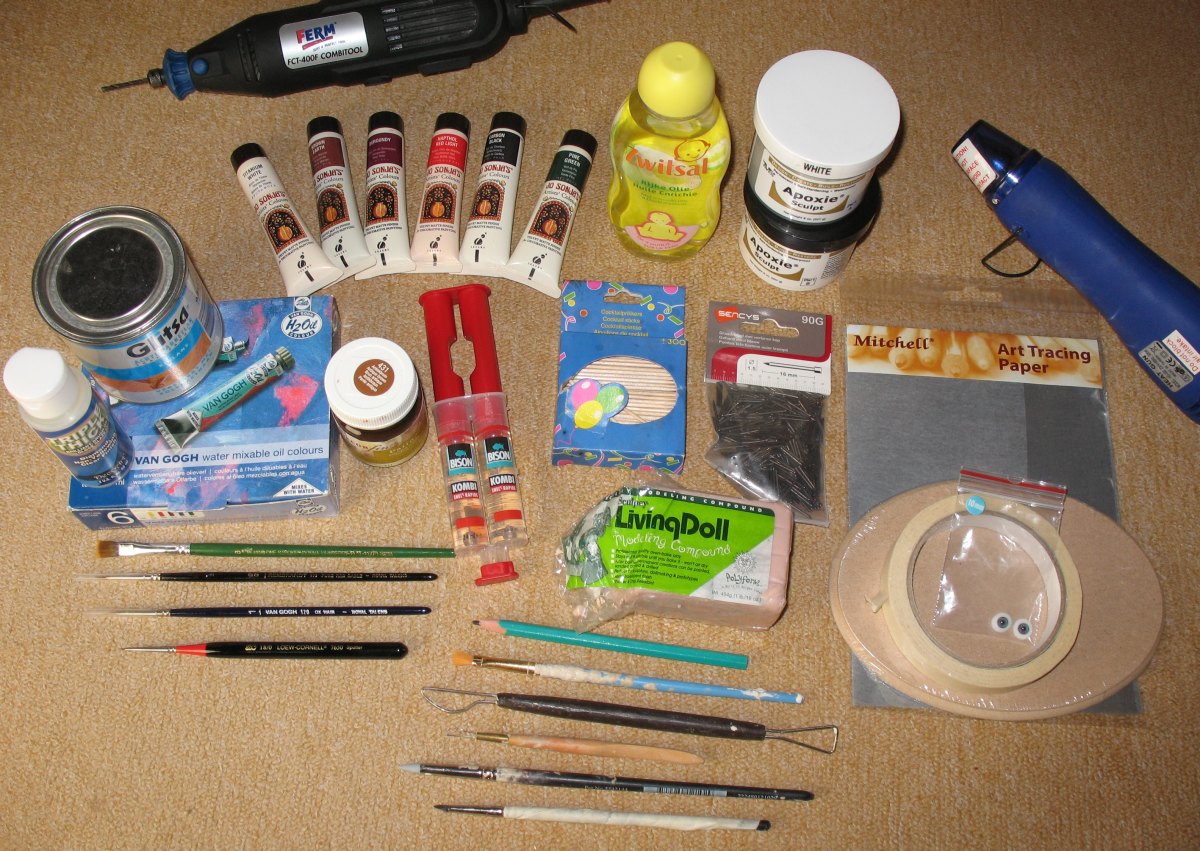
Tools
I used click picture for enlargement |
|
| *
Wooden board/plate 7 x 4.7 inch * LivingDoll polymerclay or another brand * Glass eyes 10 mm or synthetic (if heat resistant) * Sculpting tools * Acrylic paint * Antique brown patina oilbased (you could use waterbased, but this dries usually too fast) * Varnish gloss and matte * Babyoil or hand cream * Paintbrushes |
*
Carbon paper * Tape * Pencil * Heatgun * Drilling tools * Glue * Aves Apoxie sculpt * Screws * Oven |
 |
 |
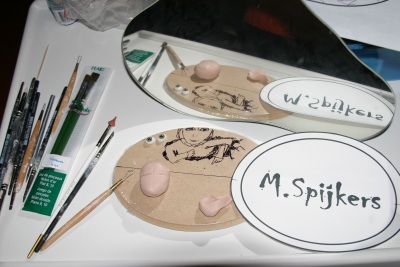
| 1)
I wrapped the board with plastic foil and sketched with a marker roughly
where the head and arms will come. Also drew a line in the middle of the
plate on the foil. The name I made in Word using the font 'Chiller'. It's
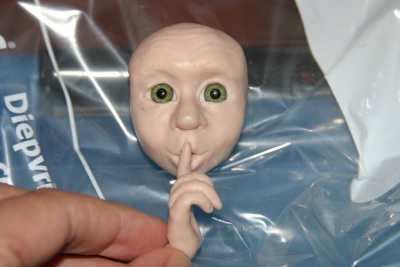
the same size oval as the board. For the head I started out with an oval shape that would fit the head area of the sketch. I placed the eyes just slightly above the horizontal middle line. |
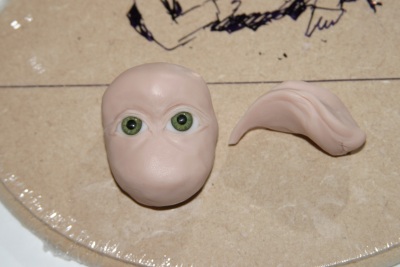
2)
Pushed the eyes into the clay, I made the upper and lower eyelids. I builded
up the face as in the face lesson at the tutorial section. Tip: Use a mirror to see if the sides of the face are a bit similar. You tend to sculpt very asymmetrical when working from 1 viewpoint only. You wont see if it starts to look crooked because your brain will compensate this, it might look a bit off but you just cant see why, well if you look at it by mirror youll see why. |
 |
 |
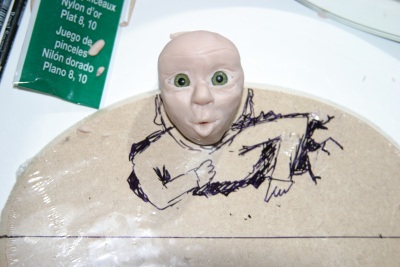
| 3) Heres the face still very roughly shaped, trying to figure out the type of mouth for a ssh dont tell, but here lives Marika pose. | 4) I smoothed the clay and did some more work on the eyelids, eyebrows, cheeks, nose And I made the first hand. How to make hands is also at the tutorial page on my website. I made a hand with a piece of wrist, so I can wrap the sleeve around it later on. I used a heatgun to fix the hand in this position (few minutes). The clay can be baked several times so this is no problem. |
 |
 |
| 5)
The head is finished here, I changed the head from flat-back to full headshape,
because it would fit my new idea better. I often change my ideas along
the way hahaha. |
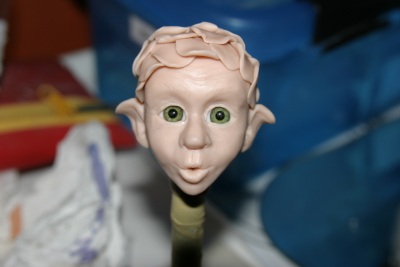
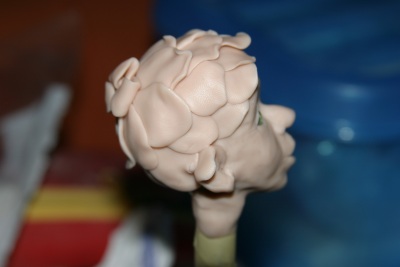
6)
He also has ears now and I used thin petal/leaves of clay to cover the
top of the head. (a picture from side view). |
 |
 |
| 7) At this picture the head is baked about half an hour at 120 degrees Celsius and so is his right arm. Im working on the left arm at this stage, the sleeve is still open so the hands wrist will fit in. | 8)
Left arm and hand finished. You see the head will stick out above the
board, this is why I made a full headshape. |
 |
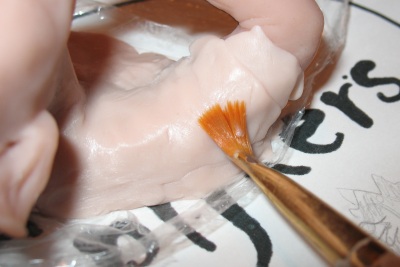 |
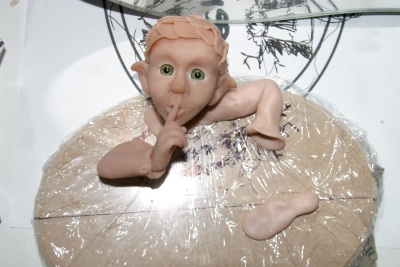
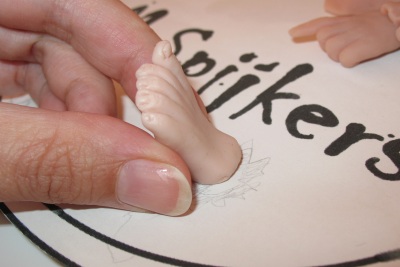
| 9) I thought it would be cute if he has one foot sticking out of the plate, so I made only half a foot. | 10) I used fresh clay to make an upper body to connect the already baked arms and head. I used some baby oil and a brush to smoothen and blend the seams. |
 |
 |
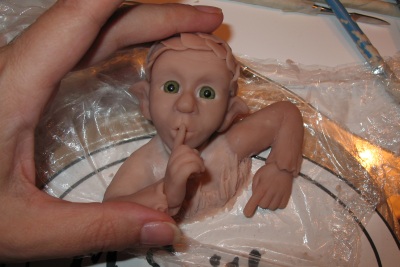
| 11)
I sculpted some wood splinters around him, like hes bursting through
the plate. Also did this around the foot. I placed a roll of clay around
the neck to make a collar. At the picture Im fixing the arm in the right position before the final baking. You better first fixate the arm with a heatgun, or it will probably move in the oven, I didnt and well he came out of the oven looking quite funny with his finger in his nose! Had to break the arm, repair and fixate it again into the right pose. |
12)
First I painted the board with a layer of cream colour acrylic paint,
when dry I painted it over with an antique brown oil based patina. I made
a cloudy effect by dabbing the wet paint with a paper towel wrapped up
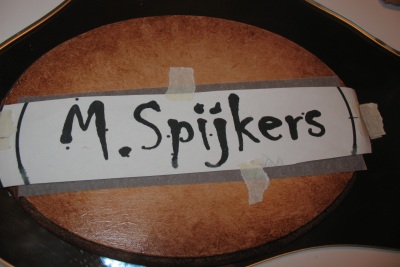
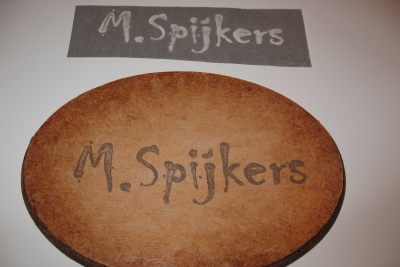
into a ball. I let it dry for 1 week before moving on. I've cut out the name and a same size piece of carbon paper and placed it on the plate, I carefully traced the letters with a pencil (not too sharp), so it would leave a mark on the plate. |
 |
 |
| 13)
The carbon paper worked well! |
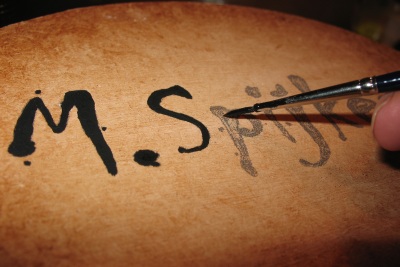
14) I used a thin paintbrush and some black acrylic paint to paint over the carbon letters. |
 |
| 15)
At this stage Ive painted the petals on the head in a green colour (acrylics)
and the blouse in a dark red colour. |
 |
| 16) Afther the acrylic paint was dry, I painted him all over with the antique brown oil-based patina. |
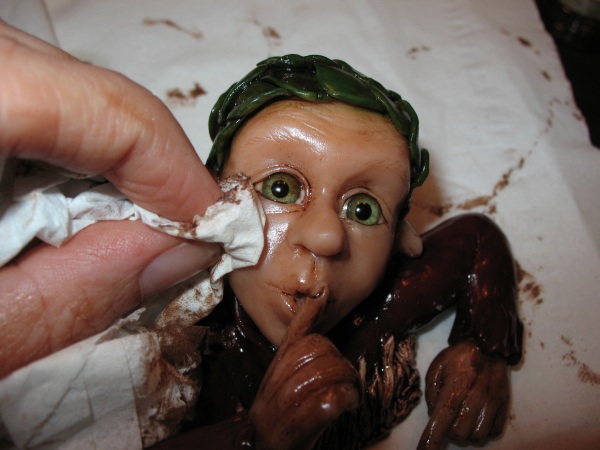 |
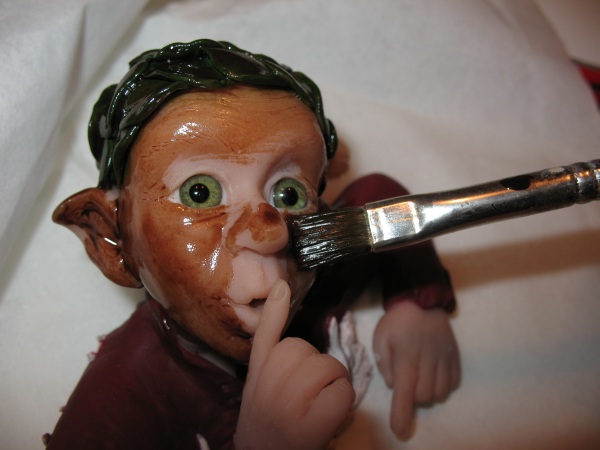
| 17) With a soft tissue I rubbed away most of the paint, it makes the colour darker in lines and lighter on the surface, this gives more depth. You could also use a water based patina but you need to work really fast to get an even colour, because of the fast drying process. I let the oil-based patina paint dry for 1 week. |
 |
| 18) Drilled holes for the screws, I also painted 2 plastic screw shields to cover up the screws when finished. With a Dremel/multitool (with a really thin drill) I made a hole in the foot and also in the back of the body and glued in a wire nail for better attachment to the plate. I also drilled holes in the plate where the wire nails will fit in. |
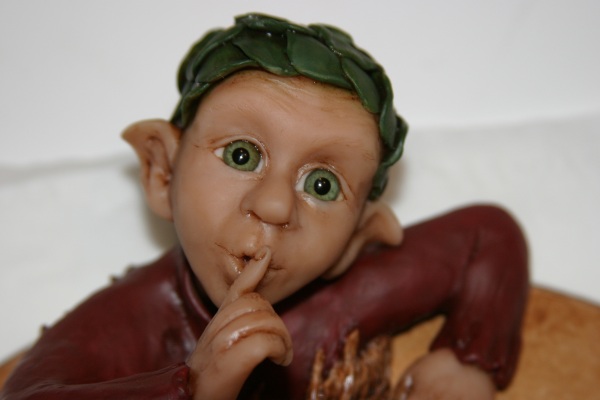 |
| 19) Hes not yet completely dry in this picture, you still see some wet shininess from the deeper parts. This was 1 day after painting. After a week it was dry enough. |
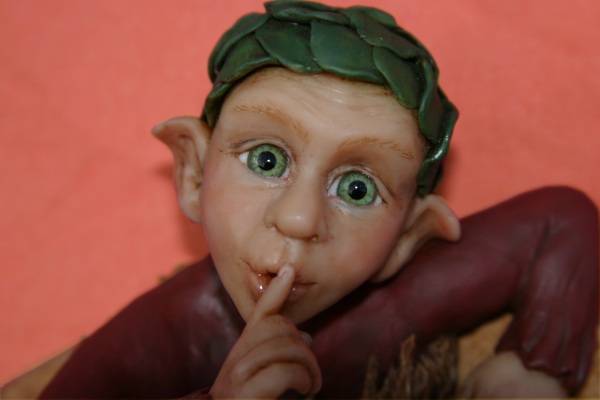 |
| 20)
I used H2Oil (water mixable oilpaint) to paint the features of the face,
but acrylic paint will do the job too. I used transparent colours for
the eyebrows, some brown under the upper eyelid. A pinkish colour inside
the lower eyelids and the inside-corner of the eyes. For the lips a natural warm flesh tone (mix of a little bit flesh colour, brown, red, white and thinned with water) finished with a little gloss varnish. For the cheeks some small dots of thinned red paint, worked over the cheeks with a tissue making circular movements. I painted the fingernails and toenails in a natural colour en used Tripple Thick Gloss varnish for the nails. I didnt use a gloss varnish on the eyes of my little fellow because the eyes were already very shiny. |
 |
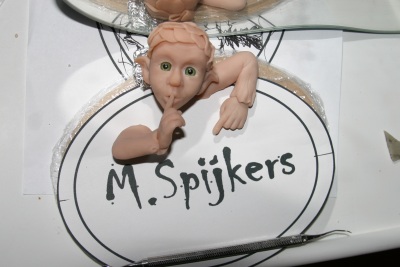
| 21)
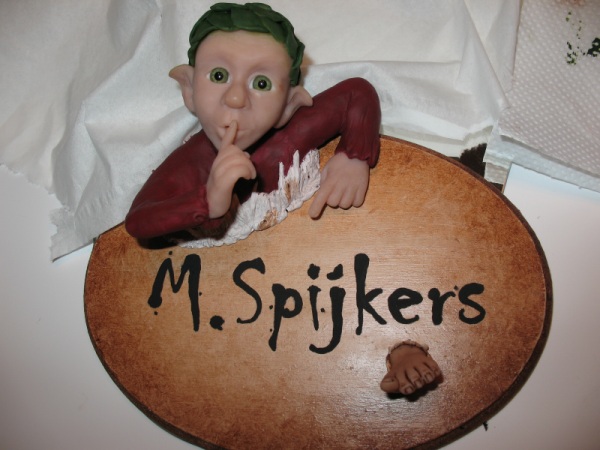
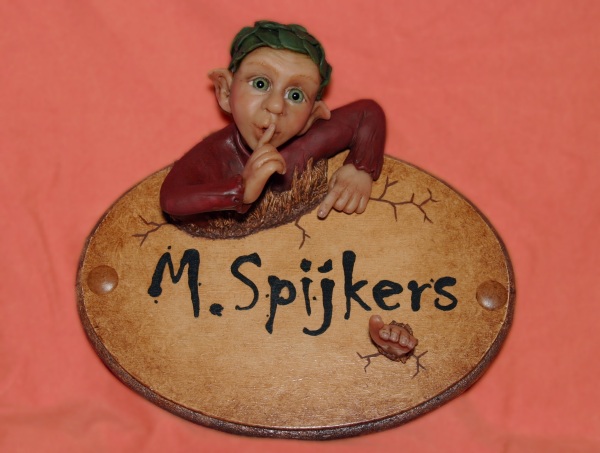
The nameplate is finished! I painted some cracks on the plate with acrylics
where hes climbing through. The backside of the plate is also painted
and both sides are varnished to protect it from the weather. I used a
2 compound glue suitable for outside use to glue the parts to the plate
(with the nails in the holes). I added a small border of apoxie sculpt around the clayparts to fill up any space between the plate and clay, so no water can get underneath and to make it extra strong, painted it with brown acrylics. I used a matte varnish spray (Mr Superclear) for the petals on the head and the blouse, The face, hands and foot are not varnished, its not necessary, the clay is already water resistant because it is polymer. |