Hands
![]()
The hand I made for this lesson is from the palm of the hand to the finger tips about 1.80 inch. It is a bit bigger than I usually make, smaller gave some photographic problems 'cause I don't have a macro lens. |
 |
 |
|
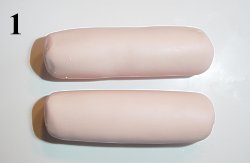
The size of the hands depend on the size of the head. The length of a hand is equal to the length from chin to halfway the forehead. A face is usually about 2 hands wide. This can always vary a bit depending on the kind of doll. You start off by making 2 cylinder shaped rolls of fimo, in this lesson they are about 2.6 inch long and 0.60 inch thick (pict. 1). Sculpt one end in a kind of spoon shape by pressing the clay with your thumb. Sculpt the hand thinner to the "finger tips' by pushing it more flat (pict. 2). |
|
 |
 |
|
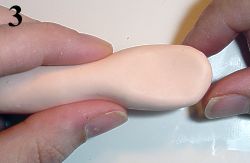
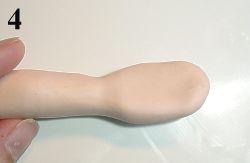
For this lesson I'll continue with the making of the right hand. Try to work simultaneously on both hands because it is hard to make an equal looking hand afterwards. To make a wrist, roll the clay between thumb and point finger like pict. 3 You now have a roughly shaped hand with a part arm. Make the arm thinner if necessary. Smooth the hand nice and round. The hollow part is the inside/hand palm of the hand (pict. 4). |
|
 |
 |
|
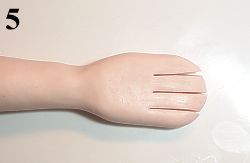
At pict. 5 you see the back of the hand. You will now make 3 incisions with a knife for separating the fingers. The thumb will be added later. Because this will be a right hand, the incision for the little finger is cut a little further than the other incisions, take your own hand as example. Bend the 2 outer fingers gently side wards so you have more space (pict. 6). Hold the fingers between your point finger and thumb. While warming the clay by the warmth of your hands, very gently roll the fingers slightly back and forth, so the inside of the fingers will also become round. You can use a sculpting tool for the areas that are difficult to reach. |
|
 |
 |
|
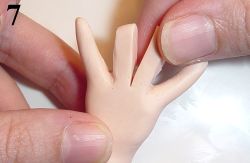
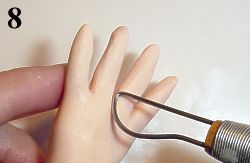
When the two outer fingers are smoothed, you start with the middle two. Bend them slightly apart and again roll them gently back and forth to round off the edges on the inside of the fingers (pict. 7). Do this very slowly, it is important that while you are doing this, the clay will be warmed by your fingers so they don't rip at the beginning. Use a sculpting tool to smooth the areas that are hard to reach (pict. 8). |
|
 |
 |
|
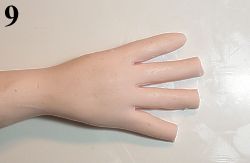
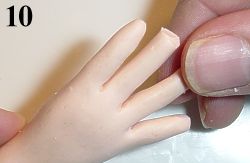
Because of the smoothing of the fingers they usually will get a little too long, cut them off at the right size (pict. 9). Round off the finger tops again (pict. 10). |
|
 |
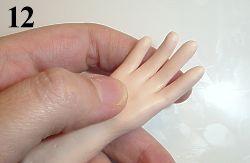 |
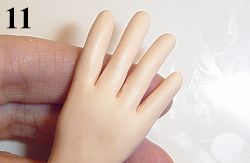
The fingers of the hand should now look something like pict. 11 We will now continue with the inside of the hand. Make the dimple of the hand a little more distinct by pressing the palm slightly with your thumb and smudging clay towards the wrist. (pict. 12). |
|
 |
 |
|
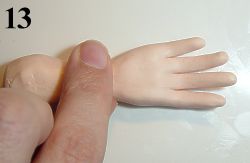
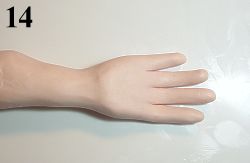
Press the clay on the wrist like in pict. 13, so you will clearly see the difference between the wrist and where the handpalm begins (pict. 14). |
|
 |
 |
|
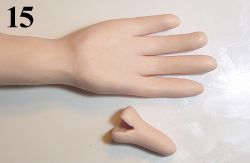
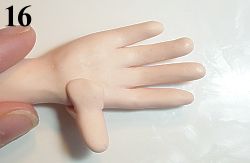
Next step is making a thumb. Sculpt a pear shape piece of fimo, make an incision in the broad part of the thumb' (pict. 15) Pull the parts a bit side-wards and place the thumb on the hand as in pict. 16. |
|