Head
![]()
|
This lesson is suitable for beginners. On the next 3 pages you'll find a step by step course with 56 pictures on how to sculpt a doll's head of fimo. The head will be about 1.80 inch tall. |
 |
 |
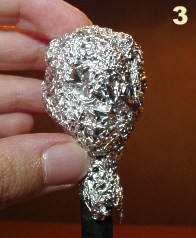 |
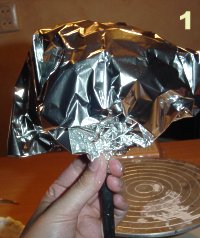
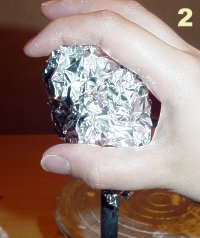
| You start off by making an aluminium foil base for the head. Cut a piece of foil in the size 12 x 12 inch. Hold the ends together forming a parachute shape. Place it on the top of the modeling stand and keep the ends together with one hand, this will be the neck (pict. 1). With your other hand you start forming the foil into an oval shaped head (pict. 2). Push the foil firmly together (pict. 3). | ||
 |
 |
 |
|
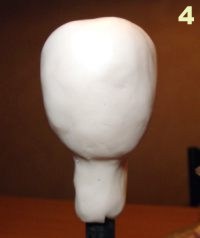
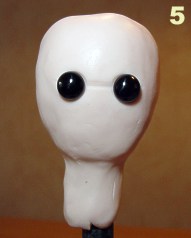
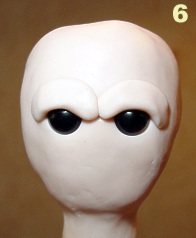
Take a piece of fimo and knead it well until it gets soft and workable. Push it into a flat piece and cover the aluminium foil head with it. Make the front of the face smooth and a bit flat (pict. 4). I used black 8 mm (0.30 inch) glass eyes for this head. Cut off the wires at the back. The position of the eyes is just a little above the middle of the face. Draw a horizontal helping line so it will be easier to get the eyes positioned in a straight line. The distance between two eyes is 1 to 1,5 eye (pict. 5). When the eyes are in a straight line, you have to push them in deeper with your thumbs, until there is only a slight bulging left. Now make 2 rolls of fimo for the upper eyelids. Flatten the rolls a bit and place them on the eyes just like pict. 6. |
||
 |
 |
 |
|
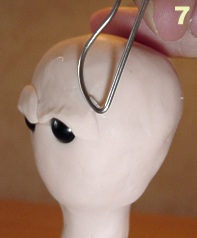
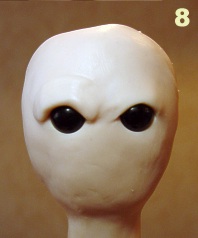
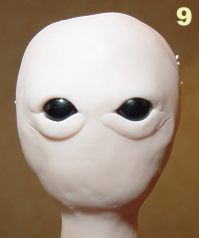
Press the seams well, use your fingers a much as possible, because the warmth of your hands makes fimo easier to model. Use a mirette to blend the seams, blend upwards and sidewards, never towards the eye (pict. 7). After you blend the seams rub it with a damp finger to smooth and polish the fimo (pict. 8). Now do the same with the other eye. For the lower eyelids make 2 smaller rolls, flatten the rolls a little and place them on the eyes as on pict. 9. |
||
 |
 |
 |
|
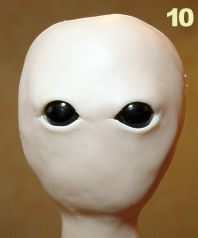
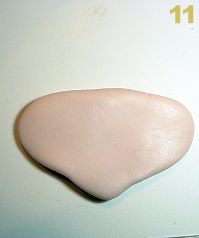
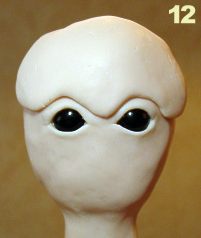
Blend the seams from the eyes downwards using a mirette, polish the fimo again with a damp finger (pict. 10). Try not to touch the inside border of the eyelids when sculpting. If it does happen you can use a wooden tooth stick to re-model the eyelids. Sculpt a slice of fimo similar to the one at pict. 11 and place this on the forehead. The pointy part comes between the eyes, the other part you'll have to shape around the eyes. (pict. 12). Press the fimo firmly so there won't be any air captured underneath. |
||
 |
 |
 |
|
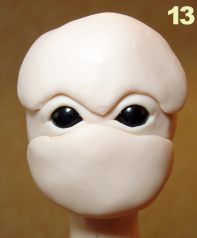
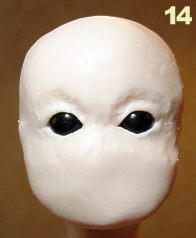
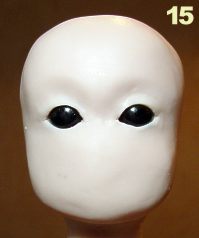
Sculpt another slice like the one on picture 11 for the lower part of the face, it will give the face more shape. Place this part on the face just as on pict. 13, keep an area free around the eyes so you will have some space left for blending. Press the seams well so they connect to the layer below. Now carefully blend the seams. Close them using short gentle strokes, do not push too hard. The seams on top of the head, at the sides and under the chin, are best blended by using your thumb. The head should now look something like pict. 14 It still looks a bit rough. Most important is that the parts that were added, are one with the rest of the face. Now it's time to smooth the seams rubbing the fimo with a damp finger. (pict. 15). Careful with the eyes, don't push too hard in the eye area. |
||
 |
 |
 |
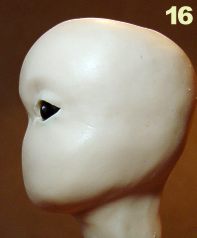
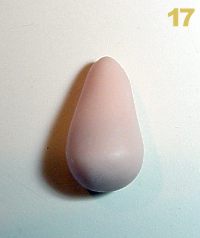
Shape the jaw line of the head. (pict.16) Sculpt a pear shape part for the nose (pict. 17) Fit this on the face for the right size, the end of the nose reaches the lower part of the face about halfway. Usually I use a little more than I need, it is easier to remove bits of fimo than too add later. Place the "pear" with the pointy part between the eyes (pict. 18). View the head from different angles to confirm the correct positioning of the nose. |
||
Page
2 ---->