Head
![]()
 |
 |
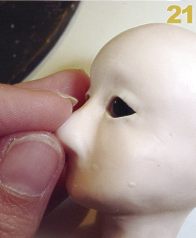 |
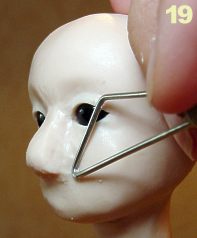
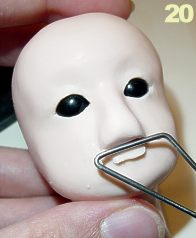
Use the mirette to blend the seams. You start with the part between the eyes, blend the seams upwards. Now blend the seams on the left and right side of the nose sidewards (pict. 19). Give the nose more shape by rubbing from between the eyes down to the point of the nose. Rub the sides of the nose like this too. Polish the nose by smoothing it with a damp finger. This can be difficult because some areas are hard to reach, for those parts use your little finger or a sculpting brush. The rubbing over the nose probably made the nose too long. Define the right nose length and remove the unnecessary fimo with the mirette as on pict. 20. Reshape the point of the nose (pict. 21). |
||
 |
 |
 |
|
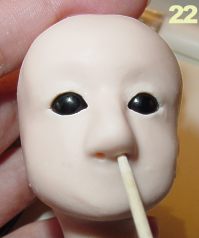
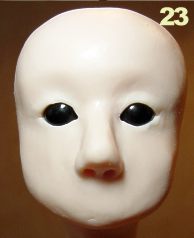
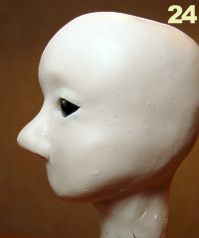
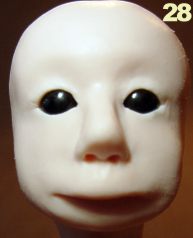
Use a wooden tooth stick to make holes for the nose. Make the holes a little bigger by twisting the tooth stick and pushing it a bit sidewards to create the nostrils. (pict. 22). Reshape the point of the nose if necessary. Watch the head from side-view to get a better sight on its shape (pict. 23 + 24). |
||
 |
 |
 |
|
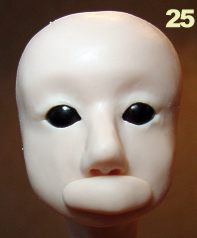
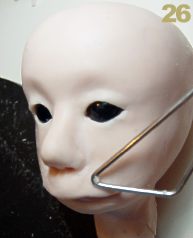
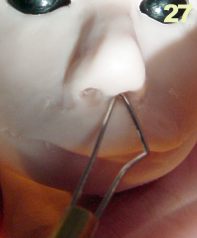
Now it is time for the mouth, starting off with the upper lip. Make a roll of fimo and flatten it. Place this right under the nose as on pict. 25. Use the mirette for blending the seams, try to really smear the fimo so it will merge gradual with the face, or else it will look unnatural (pict. 26). Blend the seam right under the nose carefully upwards into the nostrils and around the nose (pict. 27). |
||
 |
 |
 |
|
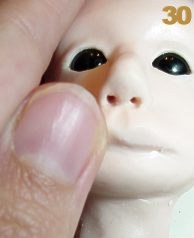
When the seams are blend you smooth the upper lip by rubbing it with a damp finger (pict. 28). Make a line on the middle of the upper lip (start between the nostrils) using a mirette (pict. 29). To give more shape to the upper lip you have to slightly push the fimo up. The easiest way is to use your thumb and push the lip left and right from the middle line a bit upwards (pict. 30). |
||
 |
 |
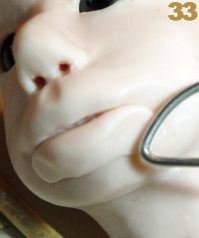 |
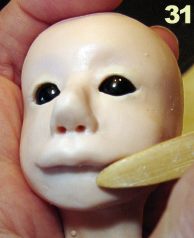
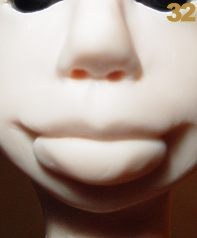
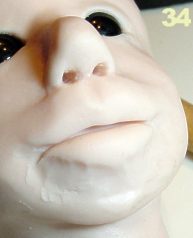
| Use your sculpting tool to push up the corners of the upper lip, it gives a smile expression to the mouth (pict. 31). Press the fimo under the upper lip with your thumb, to create a space for the lower lip. Make a roll of fimo and place it under the upper lip. It looks best when it doesn't stick out farther than the upper lip and when it is not too wide. Blend the seams as on picture 32, 33 and 34. | ||
 |
 |
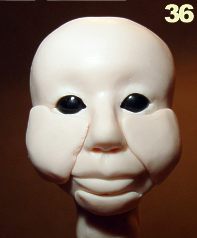 |
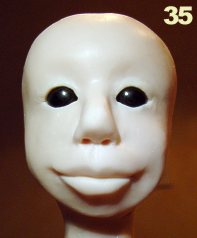
Smooth the fimo by rubbing it with a damp finger (pict. 35). Now it's time for adding cheek parts and a chin. Make 2 balls of fimo and flatten it, shape one end in a point. Place them on the face with the pointy part near the inside eye corner as on picture 36. For the chin make a little roll of fimo and place it as on pict. 36. |
||
Page 3 ---->