Head
![]()
 |
 |
 |
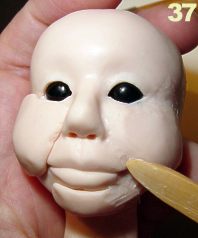
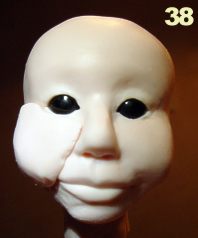
| Press the fimo parts firmly so there won't be any air bubbles trapped underneath. Press the seams well so they connect tot the layer below. Use a mirette or other sculpting tool to blend the seams (pict. 37). After the seams are blend, polish the clay by rubbing it with a damp finger. At pict. 38 you can see one side of the face finished. At pict. 39 both sides of the face are smoothed. When you think the cheeks are too full or uneven, just smear some of the fimo to the sides, all the way to the back of the head. | ||
 |
 |
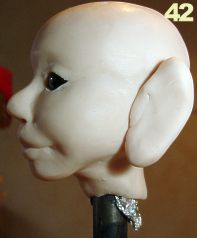 |
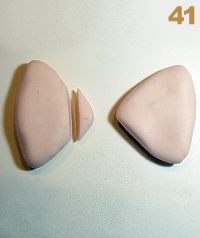
View the head from different angles. Correct the jaw line if necessary, make sure everything is smoothed. The back of the head usually looks a bit downward. Add a slice of fimo on the back of the head (blend and smooth it) to correct this, as I have done at pict. 40. Compare the side-view with picture 24 on page 2 to see the difference. Now it is time for the ears. Make 2 balls of fimo and push them flat. Mould them into triangular shapes. Take off one of the points of each triangle (pict. 41) place the ears with that part to the head (pict. 42). The positioning of the ear is just behind the cheek, usually this is just slightly over the middle (from side-view). |
||
 |
 |
 |
|
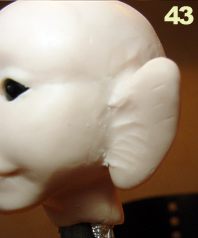
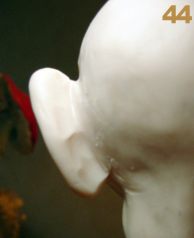
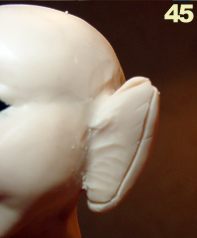
Press the ear firmly to the head. Use the mirette to blend away the seam at the front of the ear (pict. 43). Do the same with the back, top and undersite of the ear so it will be firmly attached to the head (pict. 44). The ears are still too big. Draw a helping line on the ear to define the shape and size of the ear (pict. 45). Remove the excess clay with a knife. |
||
 |
 |
 |
|
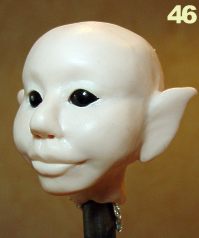
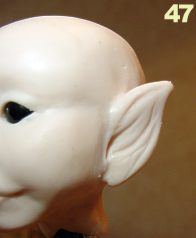
Smooth the edges of the ear using your fingers. Mould the top of the ear in a pointy shape, the other end into a small ear lobe (pict. 46). Use the point of the mirette to hollow out the ear to create an "acoustic duct". Give more shape to the inside of the ear making some lines with the sculpting tool (pict. 47). Compare both ears to see if they are the same size and shape. Finish the neck with a border of fimo. Blend and smooth the border. Cut the neck with a knife at about 0.60 inch. |
||
 |
 |
 |
|
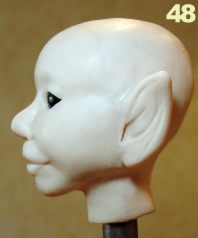
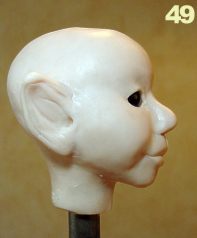
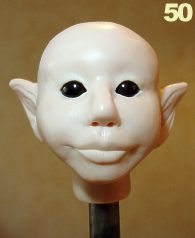
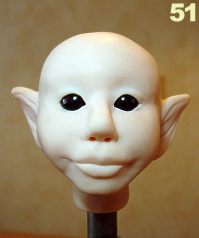
View the head for the last time from different angles, it's the last chance for fixing errors. (pict. 48, 49, 50). The head is now ready to be cured. Pre-heat the oven at 250-265 Fahrenheit. Always use an oven thermometer to make sure the oven is at the right temperature, because if it gets too hot the fimo may turn yellow/brown. Place the head in the middle of the oven and bake for about 30 minutes. Fimo still hardens after baking when cooling off, so do not touch it too soon. Let it cool off completely before taking out the head. I made a stand for placing the head in the oven. It's real easy to make, it's a small wooden board with a big nail through it, to place the head on while curing in the oven. This way you don't get press marks on the back of the head. The head on pict. 51 is cured, if you look well you'll see the clay has become matte. |
||
 |
 |
 |
|
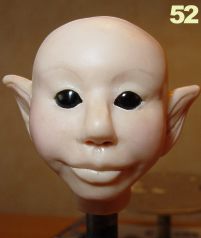
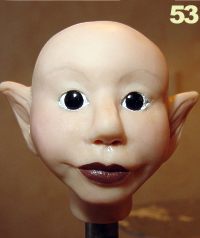
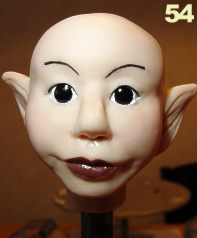
Now it is time to paint the head. Make the skin color a bit warmer using thinned brown patina (patina comes as oil based but there is also a water based patina, I used the oil based). You add the patina to the head with a brush and rub it immediately almost entirely clean with a napkin. So there will be only a slight wash left. Let this wash dry for a few hours. Add some powder rouge to the cheeks using a napkin. Draw a helping line for the eyebrows with a pencil, make sure the point is not too sharp (pict. 52). Use a very fine brush to add some dots of white acrylic paint in the eye corners. Let this dry for a moment, sometimes it takes more than one layer to cover the black. Now use a wooden tooth stick (a sharp one) to remove excess paint. Shape the white a bit in a curve so the iris will look round (pict. 53). You could add some color for the iris with a little dot of black in the middle for the pupil, but the black glass eyes with just the white already gives a nice effect and it's easier for beginners. Mix a nice color acrylic paint for the lips. The lip color at pict. 53 was a red and brown mix. I gave the lips a matte varnish finish (water based). For a natural lip color you could also use powder rouge instead, add this with a fine brush with some water or with a napkin, or use a thin wash of patina. Use a really fine brush to add a line to the upper eyelid (pict. 54), I used black acrylic paint. With the same brush you also paint the eyebrows. Make short little lines, start at the inside of the eyebrow. It's a very precise work, especially to get them equal looking, that's why it is important those pencil marks show the right eyebrow line (pict. 54). I gave extra shine to the eyes by adding a glossy varnish. |
||
 |
 |
|
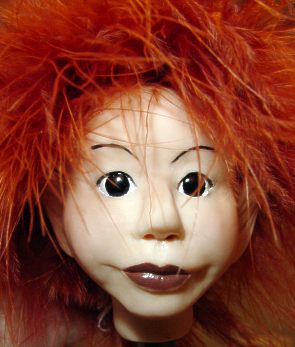
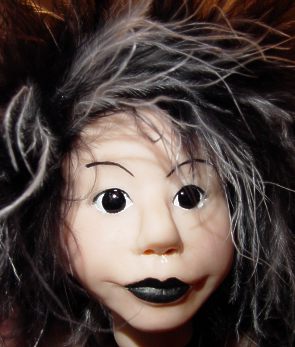
Finally the head needs some hair. There are many different types of hair available. Mohair, mini wigs, curly strings of hair, long hairy teddy bear fabric etc. For this head I used boa (little feathers sewed to a cord), it's available in all sorts of colors. For a 1.8 - 2 inch head you need about 10 inch of boa. The boa has to be glued on the head. I use a hotglue gun for this. You start off at the back of the neck, you add some glue and push the cord into it, hold it there for a moment (don't burn your fingers), you work like this in a spiral around the head until you get to the crown where you glue the last piece of boa to the head. At the pictures you can see how the color can change a dolls look. On the right picture I matched the lip color to the hair. |
|